
This lesson is made with PSPX9
But is good with other versions.
© by SvC-Design

Materialen Download :
Here
******************************************************************
Materials:
Glass_Cloclo.f1s
alpha_douceur_d_ete.pspimage
cadre Cloclo.png
deco Cloclo2.png
deco Cloclo3.png
deco Cloclo4.png
deco Cloclo5.png
divers26VSP.pspimage
Ildiko_Design.jpg
Image20.psp
misted Cloclo1.png
misted Cloclo2.png
misted Cloclo3.png
mouette Cloclo.mng
mouette.png
petit cadre Cloclo.png
texte Cloclo.png
******************************************************************
Plugin:
Plugins - Allien Skin - Eye Candy 5 Impact - Glass
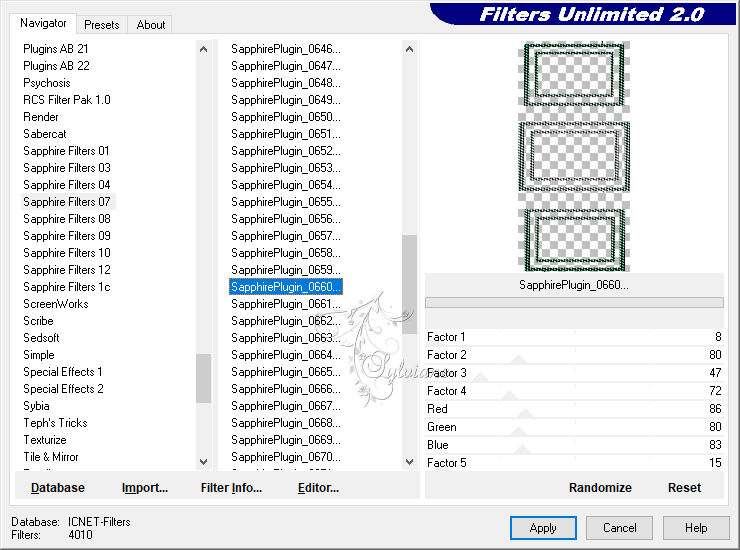
Plugins - I.C.NET software - Fiilter Unlimited 2.0 - Sapphire Filters 07 - SapphirePlugin_0660
******************************************************************
color palette
:

******************************************************************
methode
When using other tubes and colors, the mixing mode and / or layer coverage may differ
******************************************************************
General Preparations:
First install your filters for your PSP!
Masks: Save to your mask folder in PSP, unless noted otherwise
Texture & Pattern: Save to your Texture Folder in PSP
Selections: Save to your folder Selections in PSP
Open your tubes in PSP
******************************************************************
We will start - Have fun!
Remember to save your work on a regular basis
******************************************************************
1.
For the color palette put these colors just click with the pipette
Foreground # c0c0c0
Background # 094925
And: #ffffff
2.
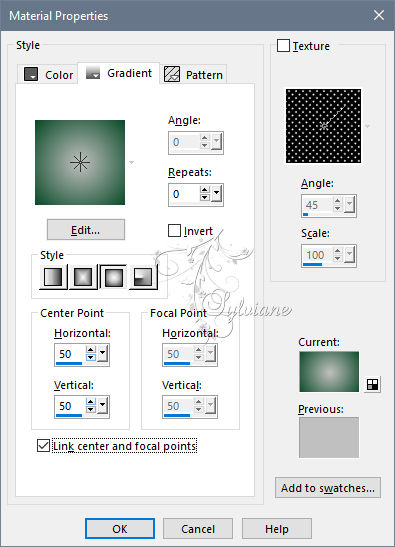
Prepare a Halo gradient
Open alpha_douceur_d_ete.pspimage
Duplicate it
Close the original
Rename raster 1
Fill in gradient
Layers - New raster layer
Fill with background color
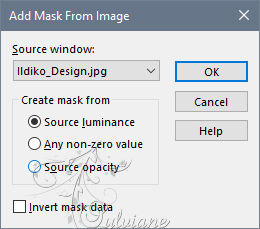
Open the Ildiko_Design mask
Layer - New mask layer - From an image - Ildiko_Design.jpg
Adjust - Sharpness / Sharpness
Layers - Merge - Merge Group
Layers – merge – merge down
Layers - New Raster Layer
Selection - Select all
Open divers26VSP.pspimage
Edit - copy
Edit - Paste in selection
Selection - Select None
Blend Mode : soft light
Layers – merge – merge down
3.
Open deco Cloclo2.png
Edit - copy
Edit - Paste as a new layer
Opacity 55
Layers – merge – merge down
Layers - New Raster Layer
Selections - Load / Save - Load selection from Alpha ChannelCloclo1
Fill in the departure gradient
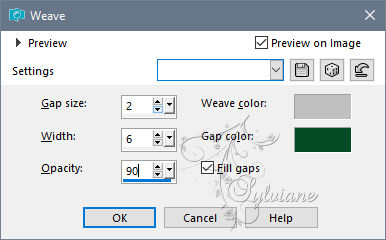
Effects - Texture effects - Wave
Plugins - Allien Skin - Eye Candy 5 Impact - Glass - Preset © Glass_Cloclo 1
Selection - Select None
Effects - 3 D Effects - Drop Shadow / 2/2/35/10
Color:#000000
Plugins - Simple - Top Left Mirror
4.
Open Image20.psp
Edit - copy
Edit - Paste as a new layer
Do not move
Blend Mode: Hard light
Opacity 55
Open petit cadre Cloclo.png
Edit - copy
Edit - Paste as a new layer
Activate selection tool (Press K on your keyboard)
And enter the following parameters:
Pos X : 594– Pos Y : -2
Press M.
Layers - New raster layer
Selections - Load / Save - Load selection from Alpha ChannelCloclo2
Fill in the departure gradient
Plugins - I.C.NET software - Fiilter Unlimited 2.0 - Sapphire Filters 07 - SapphirePlugin_0660
5.
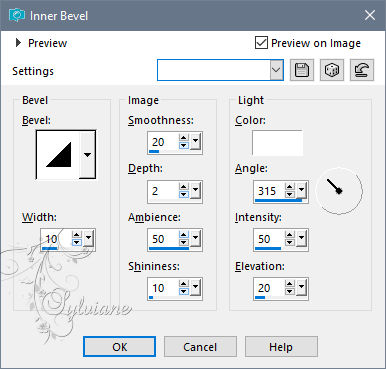
Effects – 3D effects – inner bevel
Blend Mode: Hard light
Selection - Select None
From the top of the frames
In the first one
Click inside the small frame
Layer - New raster layer
Fill in the starting gradient
Open misted Cloclo3.png
Edit - copy
Edit - paste in the selection
Selection - Select None
Layers – merge – merge down
You place on the middle frame
Click inside the small frame
Layer - New raster layer
Fill with gradient from the start
Open misted Cloclo1.png
Edit - copy
Edit - paste in the selection
Selection - Select None
Layers – merge – merge down
You place on the bottom frame
Click inside the small frame
Layer - New raster layer
Fill with gradient from the start
Open misted Cloclo2.png
Edit - copy
Edit - paste in the selection
Selection - Select None
Layers – merge – merge down
Effects - 3 D Effects - Drop Shadow / 2/2/35/10
Color:#000000
6.
Open deco Cloclo4.png
Edit - copy
Edit paste as a new layer
Activate selection tool (Press K on your keyboard)
And enter the following parameters:
Pos X :127 – Pos Y : -5
Press M.
Effects - 3 D Effects - Drop Shadow / 2/2/35/10
Color:#000000
Open deco Cloclo5.png
Edit - copy
Edit - paste as a new layer
Activate selection tool (Press K on your keyboard)
And enter the following parameters:
Pos X : 55 – Pos Y : 243
Press M.
Effects - 3 D Effects - Drop Shadow - 2/2/35/10
Color:#000000
Open mouette.png
Edit - copy
Edit - paste as a new layer
Place on the left in the circle
See final
Effects - 3 D Effects - Drop Shadow - 2/2/35/10
Color:#000000
Open deco Cloclo3.png
Edit - copy
Edit - paste as a new layer
Do not move
Open texte Cloclo.png
Edit - copy
Edit - paste as a new layer
Place to your liking
7.
Layers - Merge - Merge visible layers
Edit - copy
Open the Cloclo frame
Activar the magic wand
Edit - Paste into selection
Selection - Select None
Sign your work
Put my Watermark
Layer – merge – merge all (flatten)
Resize to 1000 pixels wide
And save as JPG
For animation
Edit Copy
Open Animation Shop
edit - paste as a new animation
Open mouette Cloclo.mng
There are 10 layers
You position on the first
Edit - Select all
Go back to your tag
Duplicate it so as to have 10 layers
You position it on the first
Edit - Select all
And drag the first layers of seagulls on your tag to the desired location
Return to seagulls / Up in the bar below Effect click on the small arrow to cancel
And slide it a second time on your tag
Save as a gif
Back
Copyright Translation © 2020 by SvC-Design